mSem resumo de edição |
Sem resumo de edição |
||
| (Há 7 revisões intermédias de 6 utilizadores que não estão a ser apresentadas) | |||
| Linha 1: | Linha 1: | ||
| − | {{DISPLAYTITLE:Dubladores}} |
||
{| class = "wikitable" width = "100%" |
{| class = "wikitable" width = "100%" |
||
! class = "header" colspan = "2" | Dublador |
! class = "header" colspan = "2" | Dublador |
||
| Linha 5: | Linha 4: | ||
! class = "header" | Outras funções na Valve |
! class = "header" | Outras funções na Valve |
||
|- |
|- |
||
| − | | align = "center" width = "100px" | {{Anchor| |
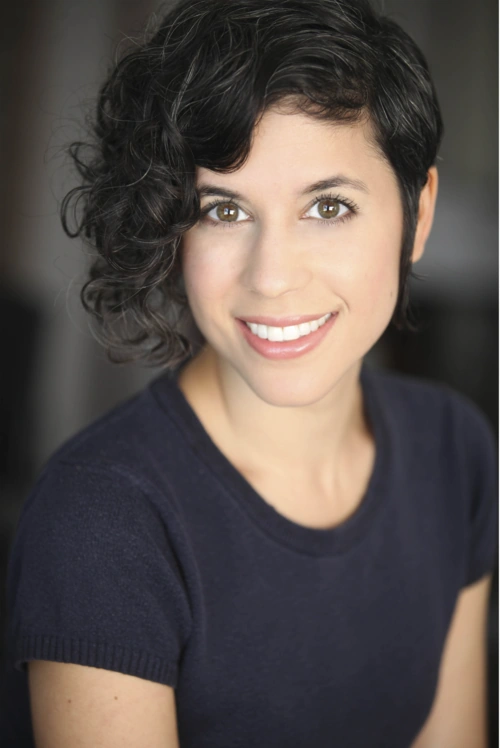
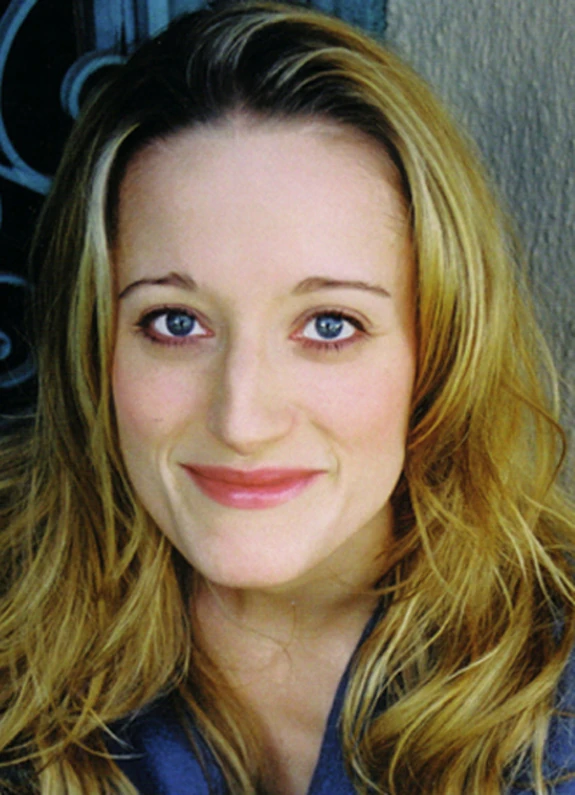
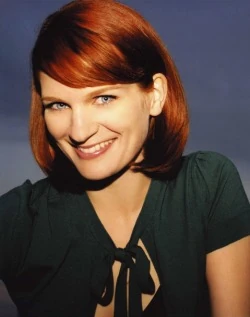
+ | | align = "center" width = "100px" | {{Anchor|Ashly Burch}}[[Ficheiro:Ashly Burch.jpg|100px]] |
| − | | align = "center" | |
+ | | align = "center" | [[w:Ashly Burch|Ashly Burch]] |
| |
| |
||
| − | * {{ |
+ | * {{H|Dark Willow}} <small>([[Dark Willow/Respostas|respostas]])</small> |
| ⚫ | |||
| ⚫ | |||
| |
| |
||
| + | * [[tf2:Miss Pauling|Miss Pauling]] ([[w:Team Fortress 2|''Team Fortress 2'']]) |
||
|- |
|- |
||
| − | | align = "center" width = "100px" | {{Anchor| |
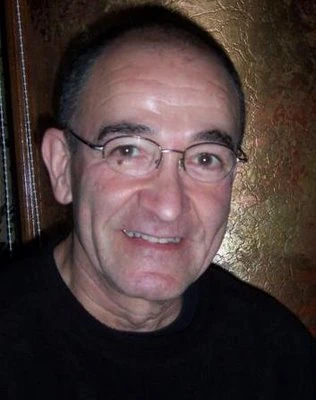
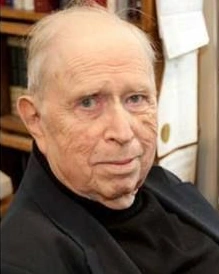
+ | | align = "center" width = "100px" | {{Anchor|Barry Dennen}}[[Ficheiro:Barry Dennen.jpg|100px]] |
| + | | align = "center" | [[w:Barry Dennen|Barry Dennen]] ({{tooltip|†|Falecido}}) |
||
| + | | |
||
| + | * {{H|Chaos Knight}} <small>([[Chaos Knight/Respostas|respostas]])</small> |
||
| ⚫ | |||
| ⚫ | |||
| + | | |
||
| + | |- |
||
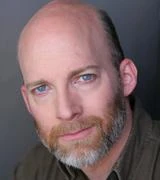
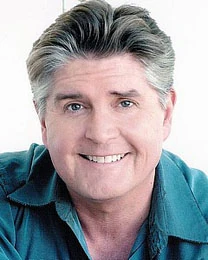
| + | | align = "center" width = "100px" | {{Anchor|Bill Millsap}}[[Ficheiro:Bill Millsap.jpg|100px]] |
||
| + | | align = "center" | [http://billmillsap.com/ Bill Millsap] |
||
| + | | |
||
| + | * {{H|Monkey King}} <small>([[Monkey King/Respostas|respostas]])</small> |
||
| + | | |
||
| + | |- |
||
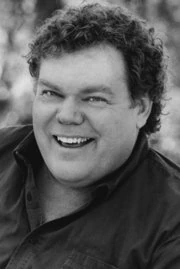
| + | | align = "center" width = "100px" | {{Anchor|Bruce Miles}}[[Ficheiro:Bruce Miles.jpg|100px]] |
||
| align = "center" | Bruce Miles |
| align = "center" | Bruce Miles |
||
| |
| |
||
| − | * {{ |
+ | * {{H|Alchemist}} <small>([[Alchemist/Respostas|respostas]])</small> |
| − | * {{ |
+ | * {{H|Lifestealer}} <small>([[Lifestealer/Respostas|respostas]])</small> |
| − | * {{ |
+ | * {{H|Omniknight}} <small>([[Omniknight/Respostas|respostas]])</small> |
| |
| |
||
|- |
|- |
||
| − | | align = "center" width = "100px" | {{Anchor|Dave Fennoy}}[[ |
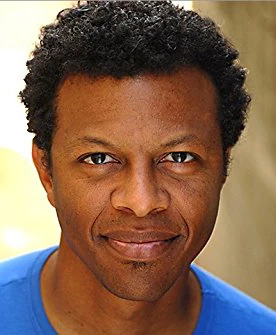
+ | | align = "center" width = "100px" | {{Anchor|Dave Fennoy}}[[Ficheiro:Dave Fennoy.jpg|100px]] |
| − | | align = "center" | |
+ | | align = "center" | [[w:Dave Fennoy|Dave Fennoy]] |
| |
| |
||
| − | * {{ |
+ | * {{H|Batrider}} <small>([[Batrider/Respostas|respostas]])</small> |
| − | * {{ |
+ | * {{H|Ember Spirit}} <small>([[Ember Spirit/Respostas|respostas]])</small> |
| − | * {{ |
+ | * {{H|Faceless Void}} <small>([[Faceless Void/Respostas|respostas]])</small> |
| − | * {{ |
+ | * {{H|Huskar}} <small>([[Huskar/Respostas|respostas]])</small> |
| − | * {{ |
+ | * {{H|Jakiro}} <small>([[Jakiro/Respostas|respostas]])</small> |
| − | * {{ |
+ | * {{H|Skeleton King}} <small>([[Skeleton King/Respostas|respostas]])</small> |
| − | * {{ |
+ | * {{H|Venomancer}} <small>([[Venomancer/Respostas|respostas]])</small> |
| − | * {{ |
+ | * {{H|Wraith King}} <small>([[Wraith King/Respostas|respostas]])</small> |
| |
| |
||
|- |
|- |
||
| − | | align = "center" width = "100px" | {{Anchor|David Scully}}[[ |
+ | | align = "center" width = "100px" | {{Anchor|David Scully}}[[Ficheiro:David Scully.jpg|100px]] |
| − | | align = "center" | |
+ | | align = "center" | [[w:David Scully (actor)|David Scully]] |
| |
| |
||
| − | * {{ |
+ | * {{H|Bane}} <small>([[Bane/Respostas|respostas]])</small> |
| − | * {{ |
+ | * {{H|Dazzle}} <small>([[Dazzle/Respostas|respostas]])</small> |
| − | * {{ |
+ | * {{H|Juggernaut}} <small>([[Juggernaut/Respostas|respostas]], [[Pacote de Locutor: Juggernaut|locutor]])</small> |
| − | * {{ |
+ | * {{H|Morphling}} <small>([[Morphling/Respostas|respostas]])</small> |
| − | * {{ |
+ | * {{H|Sand King}} <small>([[Sand King/Respostas|respostas]])</small> |
| − | * {{ |
+ | * {{H|Sven}} <small>([[Sven/Respostas|respostas]])</small> |
| − | * {{ |
+ | * {{H|Weaver}} <small>([[Weaver/Respostas|respostas]])</small> |
| |
| |
||
| − | * [[l4d:NPCs#Rescue 9|APC Driver]] ( |
+ | * [[l4d:NPCs#Rescue 9|APC Driver]] ([[w:Left 4 Dead|''Left 4 Dead'']]) |
| + | * [http://counterstrike.wikia.com/wiki/SWAT SWAT] ([[w-pt:Counter-Strike: Global Offensive|''Counter-Strike: Global Offensive'']]) |
||
|- |
|- |
||
| − | | align = "center" width = "100px" | {{Anchor|David Sobolov}}[[ |
+ | | align = "center" width = "100px" | {{Anchor|David Sobolov}}[[Ficheiro:David Sobolov.png|100px]] |
| − | | align = "center" | |
+ | | align = "center" | [[w:David Sobolov|David Sobolov]] |
| |
| |
||
| − | * {{ |
+ | * {{H|Terrorblade}} <small>([[Terrorblade/Respostas|respostas]])</small> |
| |
| |
||
|- |
|- |
||
| − | | align = "center" width = "100px" | {{Anchor|Dee Bradley Baker}}[[ |
+ | | align = "center" width = "100px" | {{Anchor|Dee Bradley Baker}}[[Ficheiro:Dee Bradley Baker.jpg|100px]] |
| − | | align = "center" | |
+ | | align = "center" | [[w:Dee Bradley Baker|Dee Bradley Baker]] |
| |
| |
||
| − | * {{ |
+ | * {{H|Techies}} <small>([[Techies/Respostas|respostas]], [[Techies' Bombastic Box|locutor]])</small> |
| |
| |
||
| − | * [[l4d:Common Infected|Infectado comum]] ( |
+ | * [[l4d:Common Infected|Infectado comum]] ([[w:Left 4 Dead 2|''Left 4 Dead 2'']]) |
* [[l4d:The Jockey|Jockey]] (''Left 4 Dead 2'') |
* [[l4d:The Jockey|Jockey]] (''Left 4 Dead 2'') |
||
* [[l4d:The Charger|Charger]] (''Left 4 Dead 2'') |
* [[l4d:The Charger|Charger]] (''Left 4 Dead 2'') |
||
* [[l4d:The Spitter|Spitter]] (''Left 4 Dead 2'') |
* [[l4d:The Spitter|Spitter]] (''Left 4 Dead 2'') |
||
| − | * [[portal:ATLAS|ATLAS]] e [[portal:P-body|P-body]] ( |
+ | * [[portal:ATLAS|ATLAS]] e [[portal:P-body|P-body]] ([[w:Portal 2|''Portal 2'']]) |
|- |
|- |
||
| − | | align = "center" width = "100px" | {{Anchor|Dempsey Pappion}}[[ |
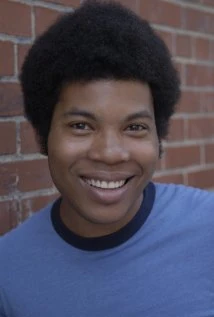
+ | | align = "center" width = "100px" | {{Anchor|Dempsey Pappion}}[[Ficheiro:Dempsey Pappion.jpg|100px]] |
| − | | align = "center" | |
+ | | align = "center" | [[w:Dempsey Pappion|Dempsey Pappion]] |
| |
| |
||
| − | * {{ |
+ | * {{H|Magnus}} <small>([[Magnus/Respostas|respostas]])</small> |
| − | * {{ |
+ | * {{H|Nyx Assassin}} <small>([[Nyx Assassin/Respostas|respostas]])</small> |
| − | * {{ |
+ | * {{H|Visage}} <small>([[Visage/Respostas|respostas]])</small> |
| |
| |
||
|- |
|- |
||
| − | | align = "center" width = "100px" | {{Anchor|Dennis Bateman}}[[ |
+ | | align = "center" width = "100px" | {{Anchor|Dennis Bateman}}[[Ficheiro:Dennis Bateman.png|100px]] |
| align = "center" | Dennis Bateman |
| align = "center" | Dennis Bateman |
||
| |
| |
||
| − | * {{ |
+ | * {{H|Invoker}} <small>([[Invoker/Respostas|respostas]])</small> |
| |
| |
||
| − | * [[tf2:Pyro|Pyro]] ( |
+ | * [[tf2:Pyro|Pyro]] ([[w:Team Fortress 2|''Team Fortress 2'']]) |
* [[tf2:Spy|Spy]] (''Team Fortress 2'') |
* [[tf2:Spy|Spy]] (''Team Fortress 2'') |
||
* [[l4d:NPCs#News Chopper 5 Pilot|Piloto de helicóptero]] (''Left 4 Dead'') |
* [[l4d:NPCs#News Chopper 5 Pilot|Piloto de helicóptero]] (''Left 4 Dead'') |
||
|- |
|- |
||
| − | | align = "center" width = "100px" | {{Anchor|Ellen McLain}}[[ |
+ | | align = "center" width = "100px" | {{Anchor|Ellen McLain}}[[Ficheiro:Ellen McLain.png|100px]] |
| − | | align = "center" | |
+ | | align = "center" | [[w:Ellen McLain|Ellen McLain]] |
| |
| |
||
| − | * {{ |
+ | * {{H|Broodmother}} <small>([[Broodmother/Respostas|respostas]])</small> |
| − | * {{ |
+ | * {{H|Death Prophet}} <small>([[Death Prophet/Respostas|respostas]], [[Locutora: Death Prophet|locutor]])</small> |
| − | * [[ |
+ | * [[Pacote Portal|Locutor: Portal, GLaDOS]] |
| |
| |
||
| − | * [[portal:GLaDOS|GLaDOS]] ( |
+ | * [[portal:GLaDOS|GLaDOS]] ([[w:Portal (video game)|''Portal'']], ''Portal 2'') |
| − | * [[hl2:Combine Overwatch|Overwatch]] ( |
+ | * [[hl2:Combine Overwatch|Overwatch]] ([[w:Half-Life 2|''Half-Life 2'']], [[w:Half-Life 2: Episode One|''Episode One'']], [[w:Half-Life 2: Episode Two|''Episode Two'']]) |
* [[tf2:Administrator|A Administradora]] (''Team Fortress 2'') |
* [[tf2:Administrator|A Administradora]] (''Team Fortress 2'') |
||
* [[l4d:The Witch|Witch]] (''Left 4 Dead 2'') |
* [[l4d:The Witch|Witch]] (''Left 4 Dead 2'') |
||
|- |
|- |
||
| − | | align = "center" width = "100px" | {{Anchor|Eric Newsome}}[[ |
+ | | align = "center" width = "100px" | {{Anchor|Eric Newsome}}[[Ficheiro:Eric Newsome.jpg|100px]] |
| align = "center" | Eric Newsome |
| align = "center" | Eric Newsome |
||
| |
| |
||
| − | * {{ |
+ | * {{H|Chen}} <small>([[Chen/Respostas|respostas]])</small> |
| − | * {{ |
+ | * {{H|Leshrac}} <small>([[Leshrac/Respostas|respostas]])</small> |
| − | * {{ |
+ | * {{H|Nature's Prophet}} <small>([[Nature's Prophet/Respostas|respostas]], [[Pacote de Locutor: Nature's Prophet|locutor]])</small> |
| − | * {{ |
+ | * {{H|Razor}} <small>([[Razor/Respostas|respostas]])</small> |
| − | * {{ |
+ | * {{H|Tidehunter}} <small>([[Tidehunter/Respostas|respostas]])</small> |
| − | * {{ |
+ | * {{H|Tiny}} <small>([[Tiny/Respostas|respostas]])</small> |
| − | * {{ |
+ | * {{H|Zeus}} <small>([[Zeus/Respostas|respostas]])</small> |
| |
| |
||
|- |
|- |
||
| − | | align = "center" width = "100px" | {{Anchor|Fred Tatasciore}}[[ |
+ | | align = "center" width = "100px" | {{Anchor|Fred Tatasciore}}[[Ficheiro:Fred Tatasciore.jpg|100px]] |
| − | | align = "center" | |
+ | | align = "center" | [[w:Fred Tatasciore|Fred Tatasciore]] |
| |
| |
||
| − | * {{ |
+ | * {{H|Disruptor}} <small>([[Disruptor/Respostas|respostas]])</small> |
| − | * {{ |
+ | * {{H|Spirit Breaker}} <small>([[Spirit Breaker/Respostas|respostas]])</small> |
| − | * {{ |
+ | * {{H|Treant Protector}} <small>([[Treant Protector/Respostas|respostas]])</small> |
| − | * {{ |
+ | * {{H|Undying}} <small>([[Undying/Respostas|respostas]])</small> |
| − | * {{ |
+ | * {{H|Ursa}} <small>([[Ursa/Respostas|respostas]])</small> |
| − | * |
+ | * {{U|Golem do Warlock}} <small>([[Golem do Warlock/Respostas|respostas]])</small> |
| |
| |
||
* [[l4d:Common Infected|Infectado comum]] (''Left 4 Dead'', ''Left 4 Dead 2'') |
* [[l4d:Common Infected|Infectado comum]] (''Left 4 Dead'', ''Left 4 Dead 2'') |
||
| Linha 119: | Linha 132: | ||
* [[l4d:The Boomer|Boomer]] (''Left 4 Dead'', ''Left 4 Dead 2'') |
* [[l4d:The Boomer|Boomer]] (''Left 4 Dead'', ''Left 4 Dead 2'') |
||
|- |
|- |
||
| − | | align = "center" width = "100px" | {{Anchor|Gary Schwartz}}[[ |
+ | | align = "center" width = "100px" | {{Anchor|Gary Schwartz}}[[Ficheiro:Gary Schwartz.png|100px]] |
| align = "center" | Gary Schwartz |
| align = "center" | Gary Schwartz |
||
| |
| |
||
| − | * {{ |
+ | * {{H|Lich}} <small>([[Lich/Respostas|respostas]])</small> |
| − | * {{ |
+ | * {{H|Pugna}} <small>([[Pugna/Respostas|respostas]])</small> |
| − | * {{ |
+ | * {{H|Shadow Shaman}} <small>([[Shadow Shaman/Respostas|respostas]])</small> |
| − | * {{ |
+ | * {{H|Sniper}} <small>([[Sniper/Respostas|respostas]])</small> |
| |
| |
||
* [[tf2:Heavy|Heavy]] (''Team Fortress 2'') |
* [[tf2:Heavy|Heavy]] (''Team Fortress 2'') |
||
| Linha 132: | Linha 145: | ||
* [[l4d:NPCs#Plane Pilot|Plane pilot]] (''Left 4 Dead'') |
* [[l4d:NPCs#Plane Pilot|Plane pilot]] (''Left 4 Dead'') |
||
|- |
|- |
||
| − | | align = "center" width = "100px" | {{Anchor|Gin Hammond}}[[ |
+ | | align = "center" width = "100px" | {{Anchor|Gin Hammond}}[[Ficheiro:Gin Hammond.jpg|100px]] |
| align = "center" | Gin Hammond |
| align = "center" | Gin Hammond |
||
| |
| |
||
| − | * {{ |
+ | * {{H|Crystal Maiden}} <small>([[Crystal Maiden/Respostas|respostas]], [[Pacote de Locutor: Crystal Maiden|locutor]])</small> |
| − | * {{ |
+ | * {{H|Drow Ranger}} <small>([[Drow Ranger/Respostas|respostas]])</small> |
| − | * {{ |
+ | * {{H|Enchantress}} <small>([[Enchantress/Respostas|respostas]])</small> |
| − | * {{ |
+ | * {{H|Mirana}} <small>([[Mirana/Respostas|respostas]])</small> |
| − | * {{ |
+ | * {{H|Phantom Assassin}} <small>([[Phantom Assassin/Respostas|respostas]])</small> |
| − | * {{ |
+ | * {{H|Spectre}} <small>([[Spectre/Respostas|respostas]])</small> |
| − | * {{ |
+ | * {{H|Vengeful Spirit}} <small>([[Vengeful Spirit/Respostas|respostas]])</small> |
| + | * [[Chamado Mercurial]], pacote de voz da {{H|Spectre}} |
||
| |
| |
||
|- |
|- |
||
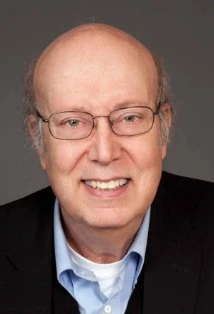
| − | | align = "center" width = "100px" | {{Anchor|Harry S. Robins}}[[ |
+ | | align = "center" width = "100px" | {{Anchor|Harry S. Robins}}[[Ficheiro:Harry S. Robins.jpg|100px]] |
| − | | align = "center" | |
+ | | align = "center" | [[w:Harry S. Robins|Harry S. Robins]] |
| |
| |
||
| − | * {{ |
+ | * {{H|Tinker}} <small>([[Tinker/Respostas|respostas]])</small> |
| − | * [[ |
+ | * [[Locutor: Dr. Kleiner|Locutor: Half Life, Dr. Kleiner]] |
| |
| |
||
* [[hl2:Isaac Kleiner|Dr. Isaac Kleiner]] (''Half-Life 2'', ''Episode One'', ''Episode Two'') |
* [[hl2:Isaac Kleiner|Dr. Isaac Kleiner]] (''Half-Life 2'', ''Episode One'', ''Episode Two'') |
||
| − | * [[hl2:Black Mesa Science Team|Cientistas da Black Mesa]] ( |
+ | * [[hl2:Black Mesa Science Team|Cientistas da Black Mesa]] ([[w:Half-Life (video game)|''Half-Life'']], [[w:Half-Life: Blue Shift|''Blue Shift'']], [[w:Half-Life: Opposing Force|''Opposing Force'']], [[w:Half-Life: Decay|''Decay'']]) |
|- |
|- |
||
| − | | align = "center" width = "100px" | {{Anchor|James Kirkland}}[[ |
+ | | align = "center" width = "100px" | {{Anchor|James Kirkland}}[[Ficheiro:James Kirkland.jpg|100px]] |
| align = "center" | James Kirkland |
| align = "center" | James Kirkland |
||
| |
| |
||
| − | * {{ |
+ | * {{H|Arc Warden}} <small>([[Arc Warden/Respostas|respostas]])</small> |
| |
| |
||
|- |
|- |
||
| − | | align = "center" width = "100px" | {{Anchor|Jen Taylor}}[[ |
+ | | align = "center" width = "100px" | {{Anchor|Jen Taylor}}[[Ficheiro:Jen Taylor.jpg|100px]] |
| − | | align = "center" | |
+ | | align = "center" | [[w:Jen Taylor|Jen Taylor]] |
| |
| |
||
| − | * {{ |
+ | * {{H|Lina}} <small>([[Lina/Respostas|respostas]], [[Pacote de Locutor: Lina|locutor]])</small> |
| − | * {{ |
+ | * {{H|Medusa}} <small>([[Medusa/Respostas|respostas]])</small> |
| − | * {{ |
+ | * {{H|Puck}} <small>([[Puck/Respostas|respostas]])</small> |
| − | * {{ |
+ | * {{H|Windranger}} <small>([[Windranger/Respostas|respostas]])</small> |
| |
| |
||
* [[l4d:Zoey|Zoey]] (''Left 4 Dead'') |
* [[l4d:Zoey|Zoey]] (''Left 4 Dead'') |
||
|- |
|- |
||
| − | | align = "center" width = "100px" | {{Anchor|Jim French}}[[ |
+ | | align = "center" width = "100px" | {{Anchor|Jim French}}[[Ficheiro:Jim French.jpg|100px]] |
| − | | align = "center" | |
+ | | align = "center" | [[w:Jim French (radio)|Jim French]] ({{tooltip|†|Falecido}}) |
| |
| |
||
| − | * {{ |
+ | * {{H|Elder Titan}} <small>([[Elder Titan/Respostas|respostas]])</small> |
| |
| |
||
* [[l4d:Bill|Bill]] (''Left 4 Dead'') |
* [[l4d:Bill|Bill]] (''Left 4 Dead'') |
||
* [[hl2:Grigori|Father Grigori]] (''Half-Life 2'') |
* [[hl2:Grigori|Father Grigori]] (''Half-Life 2'') |
||
| − | * [[hl2:Fisherman|Fisherman]] ( |
+ | * [[hl2:Fisherman|Fisherman]] ([[w:Half-Life 2: Lost Coast|''Half-Life 2: Lost Coast'']]) |
|- |
|- |
||
| − | | align = "center" width = "100px" | {{Anchor|Jim Ward}}[[ |
+ | | align = "center" width = "100px" | {{Anchor|Jim Ward}}[[Ficheiro:Jim Ward.jpg|100px]] |
| − | | align = "center" | |
+ | | align = "center" | [[w:Jim Ward (voice actor)|Jim Ward]] |
| |
| |
||
| − | * [[ |
+ | * [[Pacote de Locutor: Defense Grid|Locutor: Defense Grid, General Fletcher AI]] |
| |
| |
||
|- |
|- |
||
| − | | align = "center" width = "100px" | {{Anchor|John Patrick Lowrie}}[[ |
+ | | align = "center" width = "100px" | {{Anchor|John Patrick Lowrie}}[[Ficheiro:John Patrick Lowrie.jpg|100px]] |
| − | | align = "center" | |
+ | | align = "center" | [[w:John Patrick Lowrie|John Patrick Lowrie]] |
| |
| |
||
| − | * {{ |
+ | * {{H|Ancient Apparition}} <small>([[Ancient Apparition/Respostas|respostas]])</small> |
| − | * {{ |
+ | * {{H|Dark Seer}} <small>([[Dark Seer/Respostas|respostas]])</small> |
| − | * {{ |
+ | * {{H|Doom}} <small>([[Doom/Respostas|respostas]])</small> |
| − | * {{ |
+ | * {{H|Earthshaker}} <small>([[Earthshaker/Respostas|respostas]])</small> |
| − | * {{ |
+ | * {{H|Pudge}} <small>([[Pudge/Respostas|respostas]])</small> |
| − | * {{ |
+ | * {{H|Shadow Fiend}} <small>([[Shadow Fiend/Respostas|respostas]])</small> |
| − | * {{ |
+ | * {{H|Storm Spirit}} <small>([[Storm Spirit/Respostas|respostas]], [[Storm Spirit Announcer Pack|locutor]])</small> |
| |
| |
||
* [[hl2:Odessa Cubbage|Colonel Odessa Cubbage]] (''Half-Life 2'') |
* [[hl2:Odessa Cubbage|Colonel Odessa Cubbage]] (''Half-Life 2'') |
||
| Linha 200: | Linha 214: | ||
* [[l4d:NPCs#John and Amanda Slater|John Slater]] (''Left 4 Dead'') |
* [[l4d:NPCs#John and Amanda Slater|John Slater]] (''Left 4 Dead'') |
||
|- |
|- |
||
| − | | align = "center" width = "100px" | {{Anchor|Jon St. John}}[[ |
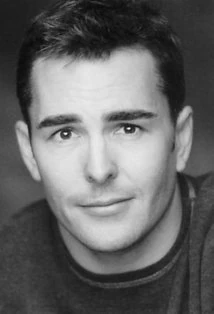
+ | | align = "center" width = "100px" | {{Anchor|Jon St. John}}[[Ficheiro:Jon St. John .jpg|100px]] |
| − | | align = "center" | |
+ | | align = "center" | [[w:Jon St. John|Jon St. John]] |
| |
| |
||
| − | * {{ |
+ | * {{H|Axe}} <small>([[Axe/Respostas|respostas]], [[Pacote de Locutor: Axe|locutor]])</small> |
| − | * {{ |
+ | * {{H|Bloodseeker}} <small>([[Bloodseeker/Respostas|respostas]])</small> |
| − | * {{ |
+ | * {{H|Enigma}} <small>([[Enigma/Respostas|respostas]])</small> |
| − | * {{ |
+ | * {{H|Kunkka}} <small>([[Kunkka/Respostas|respostas]])</small> |
| |
| |
||
* [[hl2:Rosenberg|Dr. Rosenberg]] (''Blue Shift'', ''Decay'') |
* [[hl2:Rosenberg|Dr. Rosenberg]] (''Blue Shift'', ''Decay'') |
||
| Linha 213: | Linha 227: | ||
* [[hl2:Harold|Harold]] (''Blue Shift'') |
* [[hl2:Harold|Harold]] (''Blue Shift'') |
||
|- |
|- |
||
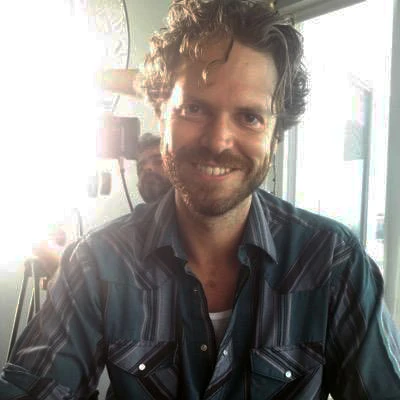
| − | | align = "center" width = "100px" | {{Anchor|Justin Roiland}}[[ |
+ | | align = "center" width = "100px" | {{Anchor|Justin Roiland}}[[Ficheiro:Justin Roiland.jpg|100px]] |
| − | | align = "center" | |
+ | | align = "center" | Justin Roiland |
| |
| |
||
| − | * [[Rick and Morty |
+ | * [[Pacote de Locutores: Rick and Morty|Locutor: Rick and Morty]] |
| |
| |
||
|- |
|- |
||
| − | | align = "center" width = "100px" | {{Anchor|Kevan Brighting}}[[ |
+ | | align = "center" width = "100px" | {{Anchor|Kevan Brighting}}[[Ficheiro:Kevan Brighting.jpg|100px]] |
| align = "center" | Kevan Brighting |
| align = "center" | Kevan Brighting |
||
| |
| |
||
| − | * [[The Stanley Parable |
+ | * [[Pacote de Locutor: The Stanley Parable|Locutor: The Stanley Parable, The Narrator]] |
| |
| |
||
|- |
|- |
||
| − | | align = "center" width = "100px" | {{Anchor|Linda K. Morris}}[[ |
+ | | align = "center" width = "100px" | {{Anchor|Linda K. Morris}}[[Ficheiro:Linda K. Morris.jpg|100px]] |
| align = "center" | Linda K. Morris |
| align = "center" | Linda K. Morris |
||
| |
| |
||
| − | * {{ |
+ | * {{H|Luna}} <small>([[Luna/Respostas|respostas]])</small> |
| − | * {{ |
+ | * {{H|Naga Siren}} <small>([[Naga Siren/Respostas|respostas]])</small> |
| − | * {{ |
+ | * {{H|Queen of Pain}} <small>([[Queen of Pain/Respostas|respostas]])</small> |
| − | * {{ |
+ | * {{H|Templar Assassin}} <small>([[Templar Assassin/Respostas|respostas]])</small> |
* [[Announcer responses|Locutor padrão]] |
* [[Announcer responses|Locutor padrão]] |
||
| |
| |
||
|- |
|- |
||
| − | | align = "center" width = "100px" | {{Anchor|Logan Cunningham}}[[ |
+ | | align = "center" width = "100px" | {{Anchor|Logan Cunningham}}[[Ficheiro:Logan Cunningham.jpeg|100px]] |
| align = "center" | Logan Cunningham |
| align = "center" | Logan Cunningham |
||
| |
| |
||
| − | * [[ |
+ | * [[Pacote de Locutor: Bastion|Locutor: Bastion, Rucks]] |
| |
| |
||
|- |
|- |
||
| − | |[[ |
+ | |[[Ficheiro:Matthew Mercer.jpg|frameless|119x119px]] |
| − | |align = "center" | Matthew Mercer |
+ | |align = "center" | [[w:Matthew Mercer|Matthew Mercer]] |
| |
| |
||
| − | * {{ |
+ | * {{H|Monkey King}} <small>([[Monkey King/Respostas|respostas]]) (Apenas no trailer)</small> |
|- |
|- |
||
| − | | align = "center" width = "100px" | {{Anchor|Merle Dandridge}}[[ |
+ | | align = "center" width = "100px" | {{Anchor|Merle Dandridge}}[[Ficheiro:Merle Dandridge.jpg|100px]] |
| − | | align = "center" | |
+ | | align = "center" | [[w:Merle Dandridge|Merle Dandridge]] |
| |
| |
||
| − | * {{ |
+ | * {{H|Legion Commander}} <small>([[Legion Commander/Respostas|respostas]])</small> |
| − | * {{ |
+ | * {{H|Winter Wyvern}} <small>([[Winter Wyvern/Respostas|respostas]])</small> |
| |
| |
||
* [[hl2:Alyx Vance|Alyx Vance]] (''Half-Life 2'', ''Episode One'', ''Episode Two'') |
* [[hl2:Alyx Vance|Alyx Vance]] (''Half-Life 2'', ''Episode One'', ''Episode Two'') |
||
|- |
|- |
||
| − | | align = "center" width = "100px" | {{Anchor|Michael Gregory}}[[ |
+ | | align = "center" width = "100px" | {{Anchor|Michael Gregory}}[[Ficheiro:Michael Gregory.jpg|100px]] |
| − | | align = "center" | |
+ | | align = "center" | [[w:Michael Gregory (actor)|Michael Gregory]] |
| |
| |
||
| − | * {{ |
+ | * {{H|Bounty Hunter}} <small>([[Bounty Hunter/Respostas|respostas]])</small> |
| − | * {{ |
+ | * {{H|Clinkz}} <small>([[Clinkz/Respostas|respostas]])</small> |
| − | * {{ |
+ | * {{H|Silencer}} <small>([[Silencer/Respostas|respostas]])</small> |
| |
| |
||
|- |
|- |
||
| − | | align = "center" width = "100px" | {{Anchor|Michael Shapiro}}[[ |
+ | | align = "center" width = "100px" | {{Anchor|Michael Shapiro}}[[Ficheiro:Michael Shapiro.jpg|100px]] |
| − | | align = "center" | |
+ | | align = "center" | [[w:Michael Shapiro (actor)|Michael Shapiro]] |
| |
| |
||
| − | * {{ |
+ | * {{H|Oracle}} <small>([[Oracle/Respostas|respostas]])</small> |
| |
| |
||
* [[hl2:Black Mesa Security Force|Guardas de segurança da Black Mesa]] (''Half-Life'', ''Blue Shift'', ''Opposing Force'', ''Decay'') |
* [[hl2:Black Mesa Security Force|Guardas de segurança da Black Mesa]] (''Half-Life'', ''Blue Shift'', ''Opposing Force'', ''Decay'') |
||
| Linha 271: | Linha 285: | ||
* [[hl2:Barney Calhoun|Barney Calhoun]] (''Half-Life 2'', ''Episode One'', ''Episode Two'') |
* [[hl2:Barney Calhoun|Barney Calhoun]] (''Half-Life 2'', ''Episode One'', ''Episode Two'') |
||
|- |
|- |
||
| − | | align = "center" width = "100px" | {{Anchor|Nolan North}}[[ |
+ | | align = "center" width = "100px" | {{Anchor|Nolan North}}[[Ficheiro:Nolan North.jpg|100px]] |
| − | | align = "center" | |
+ | | align = "center" | [[w:Nolan North|Nolan North]] |
| |
| |
||
| − | * {{ |
+ | * {{H|Brewmaster}} <small>([[Brewmaster/Respostas|respostas]])</small> |
| − | * {{ |
+ | * {{H|Earth Spirit}} <small>([[Earth Spirit/Respostas|respostas]])</small> |
| − | * {{ |
+ | * {{H|Gyrocopter}} <small>([[Gyrocopter/Respostas|respostas]])</small> |
| − | * {{ |
+ | * {{H|Keeper of the Light}} <small>([[Keeper of the Light/Respostas|respostas]])</small> |
| − | * {{ |
+ | * {{H|Lone Druid}} <small>([[Lone Druid/Respostas|respostas]])</small> |
| − | * {{ |
+ | * {{H|Lycan}} <small>([[Lycan/Respostas|respostas]])</small> |
| − | * {{ |
+ | * {{H|Meepo}} <small>([[Meepo/Respostas|respostas]])</small> |
| − | * {{ |
+ | * {{H|Ogre Magi}} <small>([[Ogre Magi/Respostas|respostas]])</small> |
| − | * {{ |
+ | * {{H|Shadow Demon}} <small>([[Shadow Demon/Respostas|respostas]])</small> |
| − | * {{ |
+ | * {{H|Troll Warlord}} <small>([[Troll Warlord/Respostas|respostas]])</small> |
| |
| |
||
* [[portal:Space Sphere|Esfera Espacial]] (''Portal 2'') |
* [[portal:Space Sphere|Esfera Espacial]] (''Portal 2'') |
||
| Linha 296: | Linha 310: | ||
* [[tf2:Soldier|Soldier]] (''Team Fortress 2''; ''Expiration Date'', uma linha) |
* [[tf2:Soldier|Soldier]] (''Team Fortress 2''; ''Expiration Date'', uma linha) |
||
|- |
|- |
||
| − | | align = "center" width = "100px" | {{Anchor| |
+ | | align = "center" width = "100px" | {{Anchor|Phil LaMarr}}[[Ficheiro:Phil LaMarr.jpg|100px]] |
| + | | align = "center" | [[w:Phil LaMarr|Phil LaMarr]] |
||
| + | | |
||
| + | * {{H|Pangolier}} <small>([[Pangolier/Respostas|respostas]])</small> |
||
| + | |- |
||
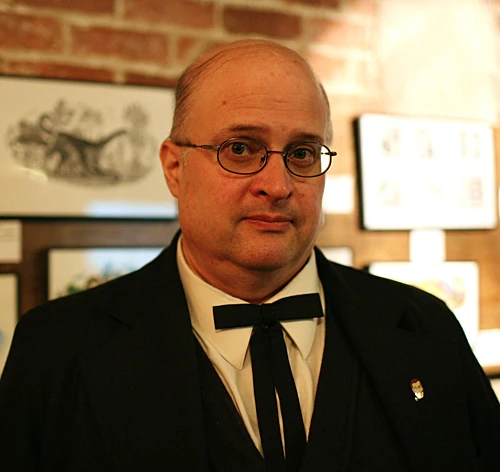
| + | | align = "center" width = "100px" | {{Anchor|Sam A. Mowry}}[[Ficheiro:Sam A. Mowry.jpg|100px]] |
||
| align = "center" | Sam A. Mowry |
| align = "center" | Sam A. Mowry |
||
| |
| |
||
| − | * {{ |
+ | * {{H|Anti-Mage}} <small>([[Anti-Mage/Respostas|respostas]])</small> |
| − | * {{ |
+ | * {{H|Beastmaster}} <small>([[Beastmaster/Respostas|respostas]])</small> |
| − | * {{ |
+ | * {{H|Clockwerk}} <small>([[Clockwerk/Respostas|respostas]], [[Pacote de Locutor: Clockwerk|locutor]])</small> |
| − | * {{ |
+ | * {{H|Necrophos}} <small>([[Necrophos/Respostas|respostas]])</small> |
| − | * {{ |
+ | * {{H|Slardar}} <small>([[Slardar/Respostas|respostas]])</small> |
| − | * {{ |
+ | * {{H|Warlock}} <small>([[Warlock/Respostas|respostas]])</small> |
| − | * [[Shopkeeper]] <small>([[Shopkeeper/ |
+ | * [[Shopkeeper]] <small>([[Shopkeeper/Respostas|respostas]])</small> |
| + | | |
||
| + | |- |
||
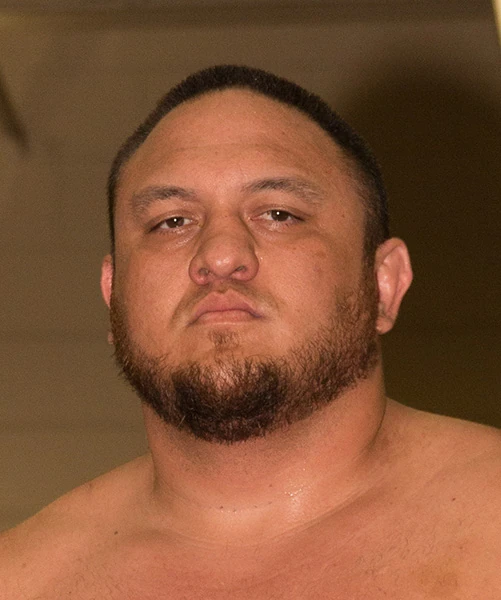
| + | | align = "center" width = "100px" | {{Anchor|Samoa Joe}}[[File:Samoa Joe.jpg|100px]] |
||
| + | | align = "center" | [[w:Samoa Joe|Samoa Joe]] |
||
| + | | |
||
| + | * [[Chamado do Legado Laminar]], pacote de voz do {{H|Juggernaut}} |
||
| + | | |
||
| + | |- |
||
| + | | align = "center" width = "100px" | {{Anchor|Steven Blum}}[[Ficheiro:Stephen Blum.jpg|100px]] |
||
| + | | align = "center" | [[w:Steven Blum|Steven Blum]] |
||
| + | | |
||
| + | * {{H|Grimstroke}} <small>([[Grimstroke/Respostas|respostas]])</small> |
||
| |
| |
||
|- |
|- |
||
| − | | align = "center" width = "100px" | {{Anchor|Stephen Russell}}[[ |
+ | | align = "center" width = "100px" | {{Anchor|Stephen Russell}}[[Ficheiro:Stephen Russell.jpg|100px]] |
| align = "center" | Stephen Russell |
| align = "center" | Stephen Russell |
||
| |
| |
||
| − | * [[ |
+ | * [[Pacote de Locutor: Fallout 4|Locutor: Fallout 4, Mister Handy]] |
| |
| |
||
|- |
|- |
||
| − | | align = "center" width = "100px" | {{Anchor|Ted Forsyth}}[[ |
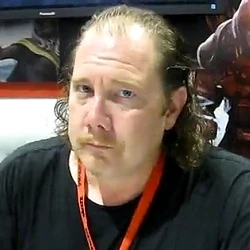
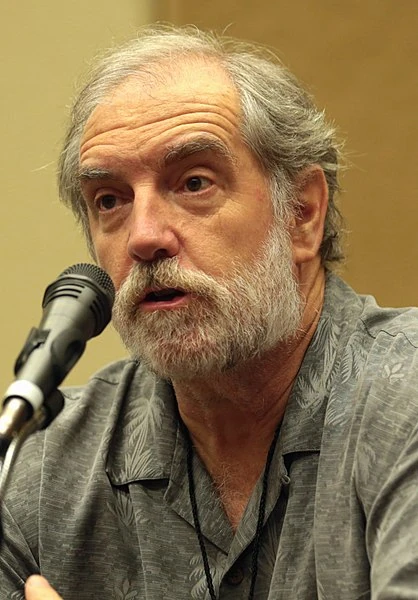
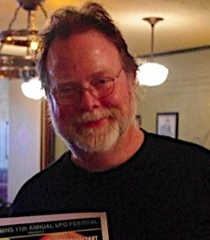
+ | | align = "center" width = "100px" | {{Anchor|Ted Forsyth}}[[Ficheiro:Pyrion Flax Voice Actor.jpg|100px]] |
| align = "center" | Ted Forsyth |
| align = "center" | Ted Forsyth |
||
| |
| |
||
| − | * [[ |
+ | * [[Pacote de Locutor: Pyrion Flax|Locutor: Pyrion Flax]] |
| |
| |
||
|- |
|- |
||
| − | | align = "center" width = "100px" | {{Anchor|Terry Wilton}}[[ |
+ | | align = "center" width = "100px" | {{Anchor|Terry Wilton}}[[Ficheiro:Terry Wilton.jpg|100px]] |
| align = "center" | Terry Wilton |
| align = "center" | Terry Wilton |
||
| |
| |
||
| − | * [[ |
+ | * [[Pacote de Locutor: Trine|Locutor: Trine]] |
| |
| |
||
|- |
|- |
||
| − | | align = "center" width = "100px" | {{Anchor|TJ Ramini}}[[ |
+ | | align = "center" width = "100px" | {{Anchor|TJ Ramini}}[[Ficheiro:TJRamini.jpg|100px]] |
| − | | align = "center" | |
+ | | align = "center" | [[w:TJ Ramini|TJ Ramini]] |
| |
| |
||
| − | * {{ |
+ | * {{H|Abaddon}} <small>([[Abaddon/Respostas|respostas]])</small> |
| − | * {{ |
+ | * {{H|Bristleback}} <small>([[Bristleback/Respostas|respostas]], [[Pacote de Locutor: Bristleback|locutor]])</small> |
| − | * {{ |
+ | * {{H|Skywrath Mage}} <small>([[Skywrath Mage/Respostas|respostas]])</small> |
| − | * {{ |
+ | * {{H|Timbersaw}} <small>([[Timbersaw/Respostas|respostas]])</small> |
| − | * {{ |
+ | * {{H|Underlord}} <small>([[Underlord/Respostas|respostas]])</small> |
| |
| |
||
|- |
|- |
||
| − | | align = "center" width = "100px" | {{Anchor|Tom Chantler}}[[ |
+ | | align = "center" width = "100px" | {{Anchor|Tom Chantler}}[[Ficheiro:Tom Chantler.jpg|100px]] |
| align = "center" | Tom Chantler |
| align = "center" | Tom Chantler |
||
| |
| |
||
| − | * {{ |
+ | * {{H|Centaur Warrunner}} <small>([[Centaur Warrunner/Respostas|respostas]])</small> |
| − | * {{ |
+ | * {{H|Lion}} <small>([[Lion/Respostas|respostas]])</small> |
| − | * {{ |
+ | * {{H|Outworld Devourer}} <small>([[Outworld Devourer/Respostas|respostas]])</small> |
| − | * {{ |
+ | * {{H|Riki}} <small>([[Riki/Respostas|respostas]])</small> |
| − | * {{ |
+ | * {{H|Slark}} <small>([[Slark/Respostas|respostas]])</small> |
| − | * {{ |
+ | * {{H|Tusk}} <small>([[Tusk/Respostas|respostas]], [[Locutor: Tusk|locutor]])</small> |
| − | * {{ |
+ | * {{H|Witch Doctor}} <small>([[Witch Doctor/Respostas|respostas]])</small> |
| |
| |
||
|- |
|- |
||
| − | | align = "center" width = "100px" | {{Anchor|Tony Todd}}[[ |
+ | | align = "center" width = "100px" | {{Anchor|Tony Todd}}[[Ficheiro:Tony Todd.jpg|100px]] |
| − | | align = "center" | |
+ | | align = "center" | [[w:Tony Todd|Tony Todd]] |
| |
| |
||
| − | * {{ |
+ | * {{H|Dragon Knight}} <small>([[Dragon Knight/Respostas|respostas]])</small> |
| − | * {{ |
+ | * {{H|Night Stalker}} <small>([[Night Stalker/Respostas|respostas]])</small> |
| − | * {{ |
+ | * {{H|Viper}} <small>([[Viper/Respostas|respostas]])</small> |
| |
| |
||
* [[hl2:Vortigaunt|Vortigaunts]] (''Episode Two'') |
* [[hl2:Vortigaunt|Vortigaunts]] (''Episode Two'') |
||
| + | |- |
||
| + | | align = "center" width = "100px" | {{Anchor|Trevor Devall}}[[Ficheiro:Trevor Devall.jpg|100px]] |
||
| + | | align = "center" | [[w:Trevor Devall|Trevor Devall]] |
||
| + | | |
||
| + | * {{H|Marte}} <small>([[Marte/Respostas|respostas]])</small> |
||
| + | | |
||
| + | |- |
||
| + | | align = "center" width = "100px" | {{Anchor|Wayne June}}[[Ficheiro:Wayne June.jpg|100px]] |
||
| + | | align = "center" | Wayne June |
||
| + | | |
||
| + | * [[Pacote de Locutor: Darkest Dungeon (com Wayne June)|Locutor: Darkest Dungeon]] |
||
| + | | |
||
|} |
|} |
||
== Observações == |
== Observações == |
||
* [[Io]] e [[Phoenix]] atualmente são os únicos heróis com nenhum diálogo falado, portanto, nenhum dublador associado. |
* [[Io]] e [[Phoenix]] atualmente são os únicos heróis com nenhum diálogo falado, portanto, nenhum dublador associado. |
||
| − | * O dublador que forneceu a voz para o [[ |
+ | * O dublador que forneceu a voz para o [[Pacote de Locutor: Capitão Pirata|Capitão Pirata]] é desconhecido. |
== Links externos == |
== Links externos == |
||
* [http://www.imdb.com/title/tt2290962/ ''Dota 2''] {{lang icon|en}} no Internet Movie Database |
* [http://www.imdb.com/title/tt2290962/ ''Dota 2''] {{lang icon|en}} no Internet Movie Database |
||
| − | * [ |
+ | * [https://i.imgur.com/zReBdEP.jpg Dubladores da Valve] {{lang icon|en}} |
| + | |||
| − | [[Category:Lists]] |
||
| + | [[Categoria:Listas]] |
||
| − | [[de:{{subst:PAGENAME}}]][[en:{{subst:PAGENAME}}]][[ru:{{subst:PAGENAME}}]][[zh:{{subst:PAGENAME}}]] |
||
| + | |||
| + | [[en:Voice actors]] |
||
| + | [[ru:Актёры озвучивания]] |
||
Edição atual desde as 12h09min de 19 de março de 2019
| Dublador | Função | Outras funções na Valve | |
|---|---|---|---|
|
Ashly Burch |
|
|
|
Barry Dennen (†) |
|
|
|
Bill Millsap | ||
|
Bruce Miles | ||
|
Dave Fennoy |
|
|
|
David Scully | ||
|
David Sobolov |
|
|
|
Dee Bradley Baker |
|
|
|
Dempsey Pappion |
|
|
|
Dennis Bateman |
| |
|
Ellen McLain |
|
|
|
Eric Newsome | ||
|
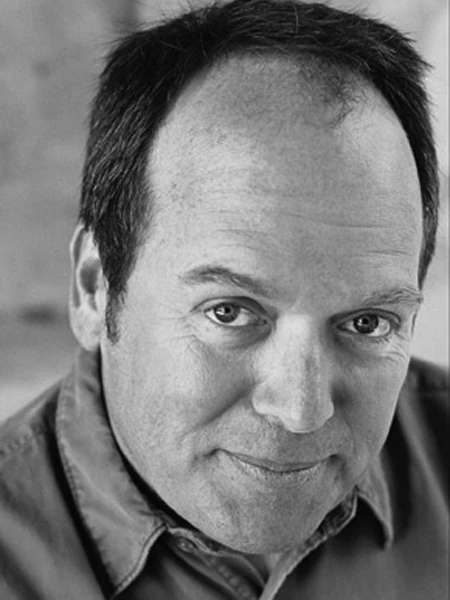
Fred Tatasciore |
|
|
|
Gary Schwartz |
| |

|
Gin Hammond |
|
|
|
Harry S. Robins |
|
|
|
James Kirkland | ||
|
Jen Taylor |
| |
|
Jim French (†) |
| |
|
Jim Ward |
|
|
|
John Patrick Lowrie |
|
|
|
Jon St. John |
| |

|
Justin Roiland |
|
|
|
Kevan Brighting |
|
|
|
Linda K. Morris |
|
|
|
Logan Cunningham |
|
|
|
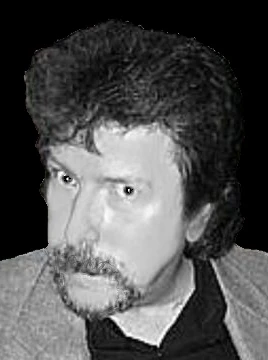
Matthew Mercer |
| |
|
Merle Dandridge |
|
|
|
Michael Gregory |
|
|
|
Michael Shapiro |
| |
|
Nolan North |
|
|
|
Phil LaMarr |
| |
|
Sam A. Mowry | ||
|
Samoa Joe |
|
|

|
Steven Blum | ||
|
Stephen Russell |
|
|
|
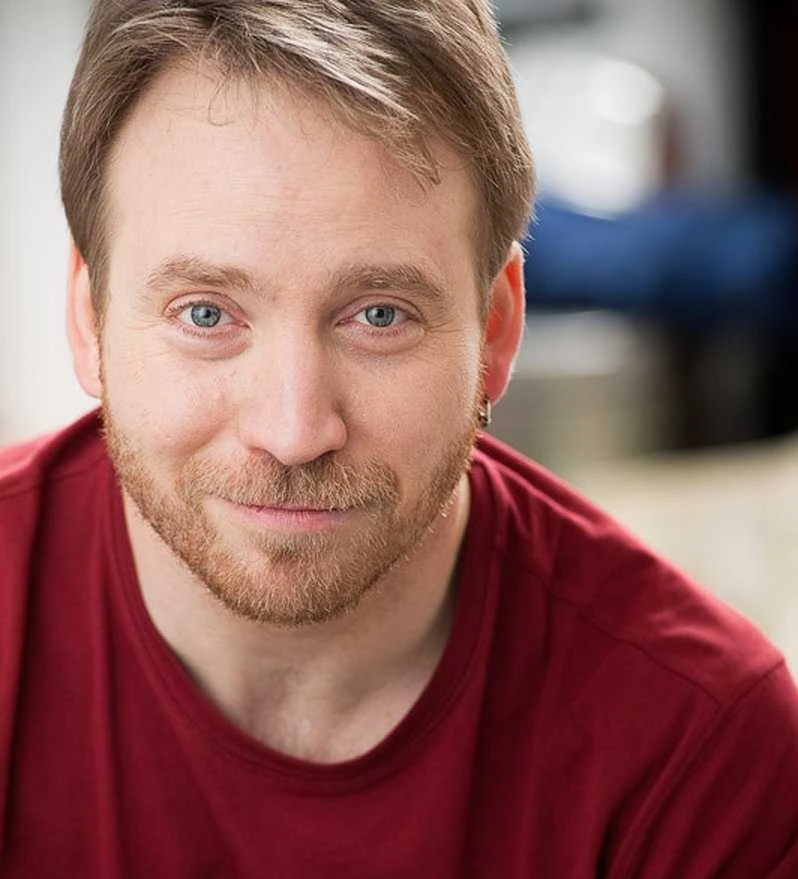
Ted Forsyth |
|
|
|
Terry Wilton |
|
|
|
TJ Ramini |
|
|
|
Tom Chantler |
|
|
|
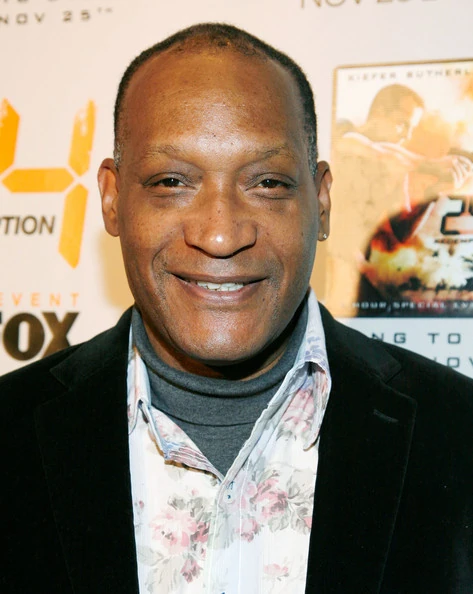
Tony Todd |
|
|
|
Trevor Devall | ||
|
Wayne June |
|
|
Observações[]
- Io e Phoenix atualmente são os únicos heróis com nenhum diálogo falado, portanto, nenhum dublador associado.
- O dublador que forneceu a voz para o Capitão Pirata é desconhecido.
Links externos[]
- Dota 2 (em inglês) no Internet Movie Database
- Dubladores da Valve (em inglês)